Building a pole barn can be an exciting project that not only enhances your property but also serves multiple purposes, whether it’s for storage, pole barn designs livestock, or even a workshop. In this comprehensive guide, we’ll walk you through every step of constructing your own pole barn—from planning and permits to the final finishing touches. So grab your tools and let’s dive into The Complete DIY Guide to Building a Pole Barn!
What are Pole Barns?
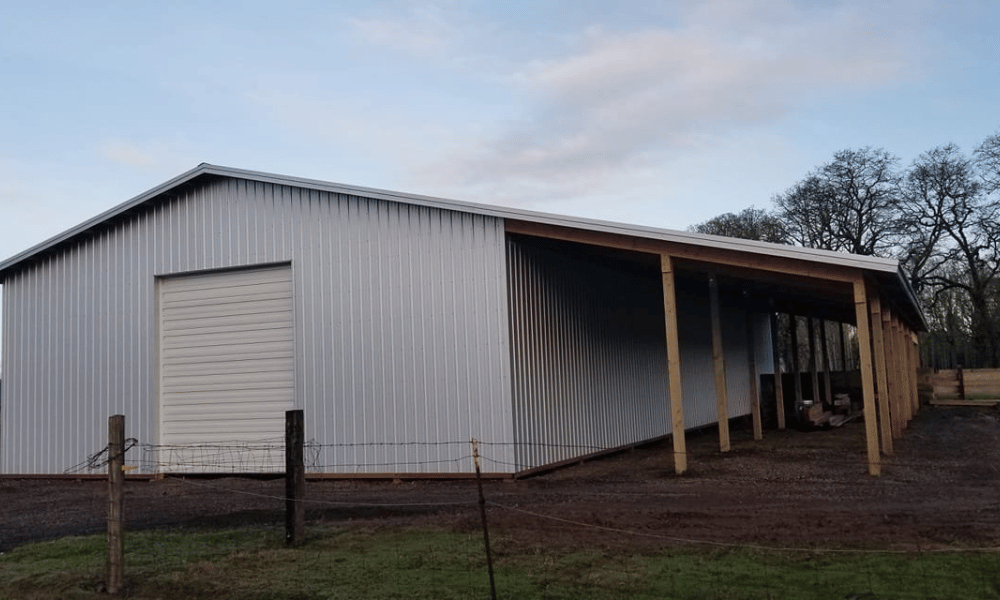
Pole barns are structures built using wooden posts or poles as the primary support system. Unlike traditional buildings with concrete foundations and heavy framing, pole barns utilize these sturdy poles buried in the ground to create a solid framework. This design not only reduces construction costs but also makes the building process much simpler.
Why Choose a Pole Barn?
You might wonder why you should consider building a pole barn over other types of structures. Here are some reasons:
- Cost-Effective: Compared to conventional buildings, pole barns generally require less material and labor. Quick Construction: With fewer components involved, you can often complete the project faster. Versatile Use: From storage to workshops, horse stables to event centers—pole barns can serve numerous functions. Customizable Design: You can easily modify your plans based on your specific needs.
The Complete DIY Guide to Building a Pole Barn: Planning Your Project
Step 1: Determine Your Purpose
Before diving into construction, ask yourself what you intend to use your pole barn for. Will it house farm equipment, serve as a garage, or perhaps function as an animal shelter? Knowing its purpose will help shape your design and size requirements.
Step 2: Check Local Regulations
Every area has different building codes and regulations when it comes to constructing structures such as pole barns. It’s crucial to check local zoning laws and obtain any necessary permits before proceeding with construction.
Step 3: Set Your Budget
Creating a budget is essential for any DIY project. Factor in materials, tools, labor (if needed), and unexpected expenses that may arise during construction.
Step 4: Design Your Layout
Sketch out your desired layout on paper or use design software. Include dimensions for doors, windows, and any additional features you want in your pole barn.
Choosing Materials for Your Pole Barn
Wood Selection
When choosing wood for your poles or framing, consider durability and resistance to rot. Pressure-treated lumber is commonly recommended due to its longevity in outdoor settings.
Roofing Options
The roofing material can impact both aesthetics and functionality:
- Metal Roofing: Known for its durability and low maintenance. Shingle Roofing: Offers traditional appeal but may require more upkeep.
Make sure the roofing option complements the overall look of your property.
Siding Choices
Just like roofing materials, siding plays a role in appearance and protection against weather elements:
- Wood Siding: Provides a rustic look but requires regular maintenance. Vinyl Siding: Low maintenance with various color options available.
The Complete DIY Guide to Building a Pole Barn: Getting Started with Construction
Site Preparation
Step 1: Clear the Area
Begin by clearing the construction site of any debris or vegetation that might obstruct building.
Step 2: Level Your Ground
Ensure that the ground is level where you plan to erect your pole barn; uneven terrain can lead to structural issues later on.
Laying Out Post Holes
Using string lines or stakes, mark out where each post will go according to your design plan. Aim for uniform spacing—usually around eight feet apart is standard.
Digging Post Holes
Typically about three feet deep (or below the frost line if applicable), these holes will provide stability once filled with concrete.
Setting Posts in Concrete
Once you've dug the holes:
Place each post in position using braces for support. Pour concrete into each hole until it reaches slightly above ground level. Allow sufficient curing time before moving forward—usually about 24 hours.Building Framework for Your Pole Barn
With posts securely set:
Attach horizontal girts between posts at intervals (typically every four feet). Install trusses or rafters on top of posts depending on roof design.Dimensions Matter
Pay attention to height! Standard heights vary based on intended use but typically range from 10’ – 16’.
Installing Walls & Roof Structure
Now comes one of the most satisfying parts—enclosing your structure!
Wall Installation Options
Depending on materials chosen:
- For metal siding:
- Start at one corner; secure panels using screws.
- Begin at bottom; nail boards vertically while ensuring they’re straight.
Roof Installation Techniques
Depending on whether you choose metal or shingles:
For metal roofs:- Lay panels starting from one end while overlapping edges appropriately.
- Begin at eaves; ensure shingles overlap adequately as you work upward toward peak.
Adding Doors & Windows: Enhancing Functionality and Aesthetics
Doors allow access while windows provide natural light—both are essential elements!
Selecting Door Types
Consider these options based on use:
- Sliding Doors Roll-Up Doors Standard Hinged Doors
Each has its advantages depending on space constraints and accessibility needs.
Window Placement Tips
Position windows strategically for optimal light without compromising security or privacy concerns.
Flooring Options For Your Pole Barn Space
Depending on usage—storage versus livestock—you may want different flooring solutions:
| Flooring Type | Pros | Cons | |--------------------|-------------------------|---------------------------| | Gravel | Good drainage | Can be uneven | | Concrete | Durable & easy cleanup | More expensive | | Dirt | Cost-effective | Requires maintenance |
Choose wisely based on both functionality and budget!
FAQ Section: Common Questions About Building Pole Barns
Q1: How long does it take to build a pole barn?
A1: Depending on size and complexity—it could take anywhere from a few days up to several weeks if done solo versus hiring professionals.
Q2: Do I need permits for my pole barn?
A2: Yes! Always check local regulations before starting construction; failing compliance could cause complications down the road.
Q3: What’s the average cost of building a pole barn?
A3: Costs vary widely based on size/materials used—but estimates typically range from $15-$50 per square foot depending upon choices made throughout the process!
Q4: Can I insulate my pole barn?
A4: Definitely! Insulation helps regulate temperature especially if used for animals/storage—consider foam boards or spray insulation methods!
Q5: Is maintenance required after completion?
A5: Absolutely! Regular inspections/checks will help prolong lifespan; keep an eye out particularly during seasonal changes!
Q6: What tools do I need for building my own pole barn?
A6: Essential tools include hammer/nails/screws/drill/saw/square/level—and don’t forget safety gear like gloves/goggles too!
Conclusion: Embrace Your New Skills with Confidence!
In conclusion, constructing a pole barn can be an enriching experience filled with learning opportunities along each step of way! By following this comprehensive guide titled “The Complete DIY Guide to Building a Pole Barn,” you're well-equipped with knowledge needed tackle this rewarding project head-on! So roll up those sleeves—your dream structure awaits! Whether it's used as storage space or transformed into something unique altogether—the possibilities are endless when it comes down creativity involved throughout process! Happy building!